Recording a Session in Microsoft Teams
You will often need to record a teaching session you are running. Below is some general advice for doing so.
Recordings can be started by any Organisers or Co-organisers in the meeting.
Note recordings in Microsoft Teams expire after 120 days, and therefore action will be required to ensure continued access. Usually this will entail downloading and uploading to Panopto, for students to access alongside other recorded material.
Notes on Recording
- Recording can be found in the top menu of a Teems Meeting, under More (which displays as elipses). From here select 'Record and Transcribe' and then 'Start Recording'
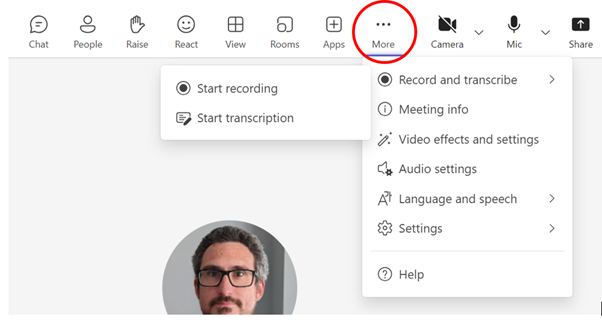
- Go to More, then 'Record and transcribe', then 'Stop Recording' when finished.
During the session
- Warn participants recording is taking place, and that their contribution may be recorded if they are using their cameras or microphone.
- Remember to stop the recording at the end of the session
- Remember mistakes and interruptions can be edited later in Panopto, as can extraneous recording of set up before and after the session, but don't feel any pressure to edit out minor errors and "umms and ahs".
Viewing your recording after the session
- You can access your recording in a number of ways.
- It will be visible for the meeting's chat for all participants (if chat is enabled for the meeting, and set to be viewable after the meeting). This will be posted in the chat after the recording is stopped, linking to the meeting's 'Recap'.
- Organisers and co-organisers can access the recording from your Teams Calendar by opening the calender entry and selecting 'Recap' on the top menu.
- Alternatively, it will be in the Onedrive folder of the organiser who started the recording, in a folder named 'Recordings'.
Downloading your recording
This can be performed by any Organiser or Co-Organiser of the meeting
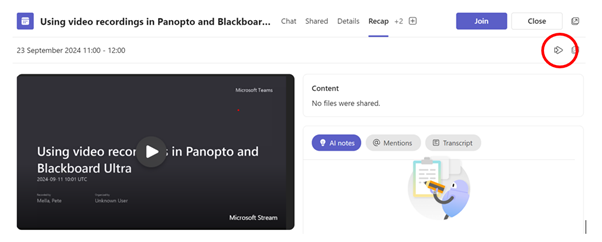
Step 1. Access the meeting's 'Recap' via the methods above.
Step 2. Select the 'Open in Stream' icon in the top left to access and edit the video in Microsoft Stream
Step 3. Select the Ellipses above the video, and select 'Download'
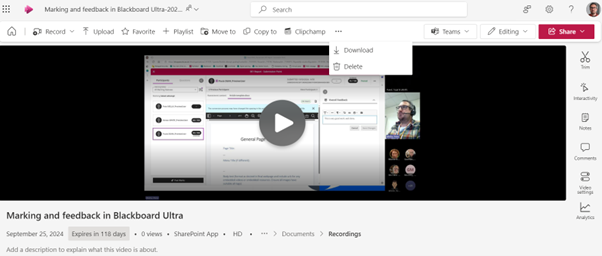
Alternatively, the member of staff who set the recording can access this via a personal folder in their OneDrive called 'Recordings'.
Adding downloaded videos to Panopto.
It is recommended recorded teaching sessions are added to Panopto, and made available to students via the Blackboard. This keeps recordings in the same place as sessions recorded in lecture theatres. For advice see Moving a Zoom or Teams recording into Panopto | Sheffield Hallam University (shu.ac.uk)