Adding text to a gradebook column
You can now add text columns to the Gradebook. Gradebook text columns support up to 32 characters including alpha-numeric and special characters, allows text to be pasted in, and can be downloaded for editing in Excel and re-uploaded.
Text columns are distinct from other grade columns in the Gradebook and do not support feedback or rubrics. You cannot assign due dates or point values to text columns. If you need a grade column to display a text-based grade (e.g. pass/fail) and attach feedback, you will need to use a standard grade column and apply a marking schema.
Content added to text columns is posted automatically, but the column can be hidden or made available to students as required.
Adding a text column
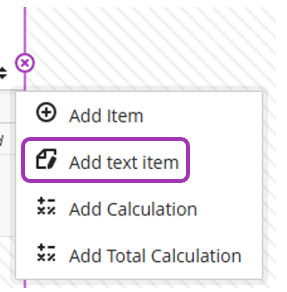
Step 1: On the Marks or Markable Items page in Gradebook, hover over a dividing line to get the Plus symbol (+) .Click the plus sign and select Add Text Item.
Step 2: Type a name for the text column, select whether you want the column to be visible or not to students, and click Save.
Adding text to a text column
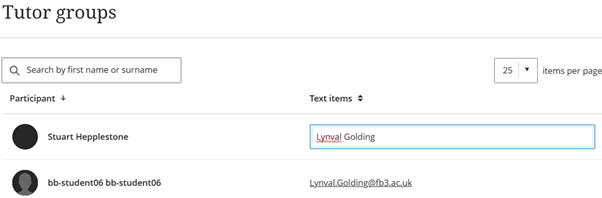
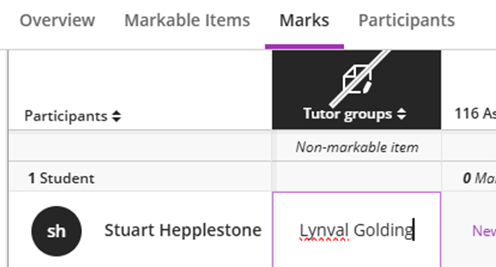
On the Marks page, simply click into a cell, enter your text, and hit return to save.
On the Markable Items page, click on the name of the text column. Click on Add text to open the text field, enter your text, and hit return to save.