- Development and Support /
- Guides /
- Other Tools /
- EchoPoll /
- EchoPoll in Browser
EchoPoll in Browser
Accessing, creating and launching polls in EchoPoll browser based application
This page provides specific instructions on how to use the EchoPoll browser based application.
To read about what EchoPoll is, its uses and how to request access to EchoPoll please read this guide first.
Screencast for browser based polling with EchoPoll
The following screencast will show you how to access EchoPoll's browser based platform, create polls and deliver them live to your participants. A written guide can be found below the video.
Singing into EchoPoll browser based application
If you have an EchoPoll set up then you can use your account credentials to sign in to EchoPoll’s browser based live polling creation platform use the following link and save it your bookmarks.
Sign into EchoPoll browser based platform
If you haven’t already got access to an institutional EchoPoll account you can request one via DTS by following the guidance on our Echo Poll introduction page
Creating and launching a live poll in EchoPoll browser based application
1. Once you have logged into your EchoPoll account you will see your EchoPoll dashboard, similar the image below.
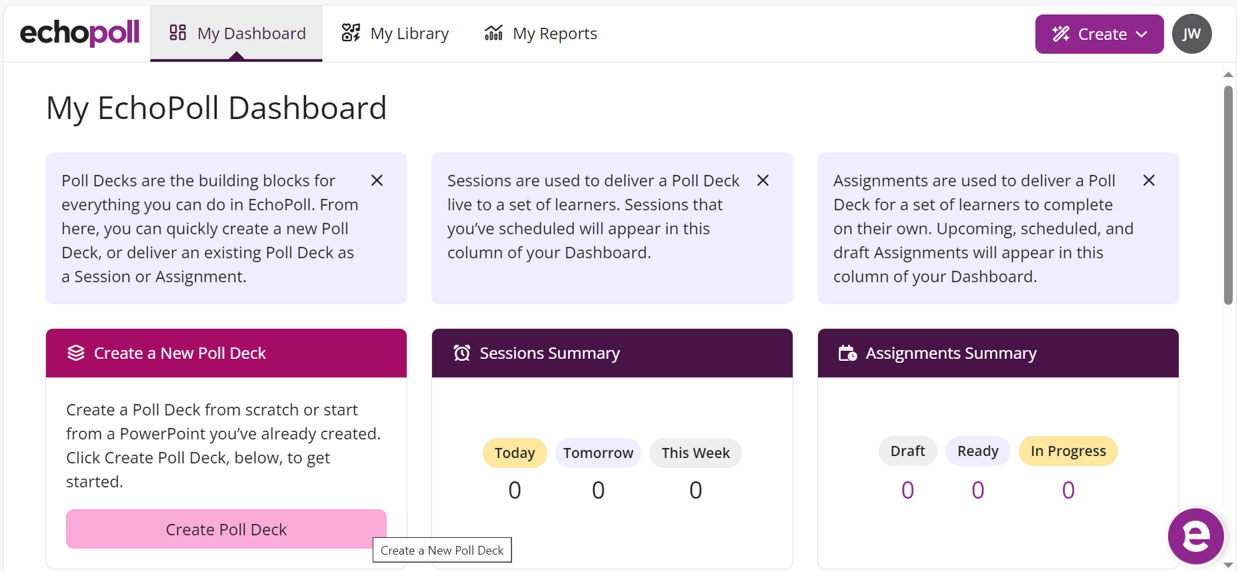
2. To create a poll select the “Create a new Poll Deck” option.
What are Poll Decks?
Poll Decks are a collection of questions that you can create in advance of a polling session and then launch at any time. You can also reuse this collection of questions again in future sessions. You can create multiple sets of poll decks.
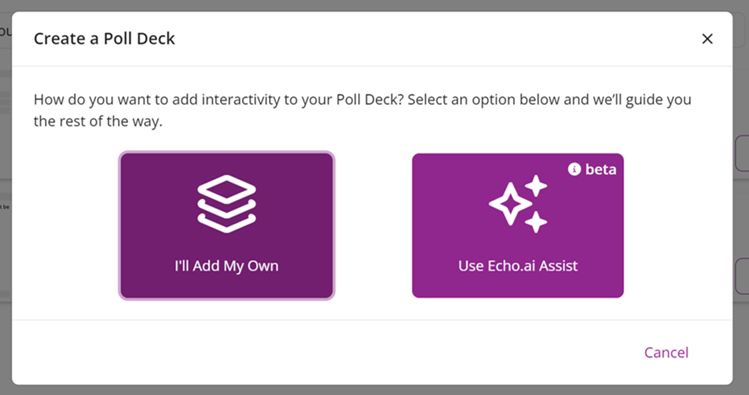
3. You will then be asked how you want to add interactivity to your Poll Deck, in this guidance we will be using the “I’ll add my own” option
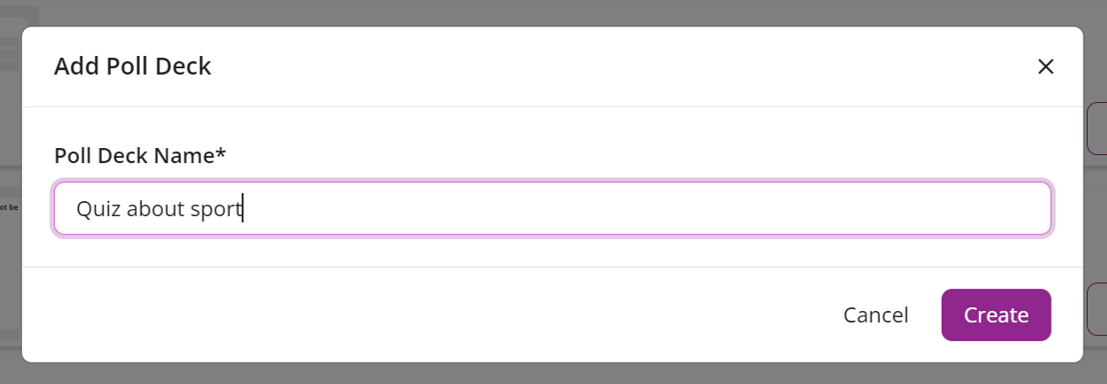
4. You will then be asked to name the poll deck you are creating. For example this set of questions may relate to a particular subject or topic such as Sport so you could name the poll Deck “quiz about sport”
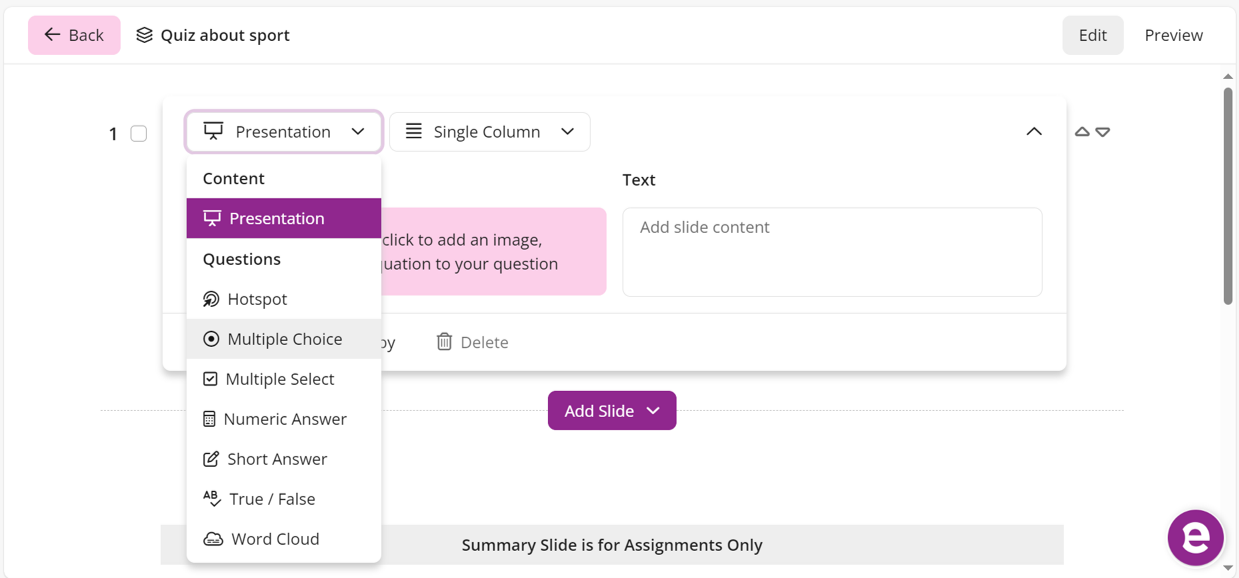
5. After naming and creating your poll deck you will then be able to start adding content to it. This is where you can start building your quiz or surveys and you can also create presentation slides as part of it if you would like to include slides of information in around your live polling questions. There are different question types you can choose from including; multiple choice, multiple select, hotspot questions, true or false questions, short answer, word clouds and more.
Once you have created a presentation slide or question slide you can add another by selecting the add slide option below the question or presentation slide you have created. You can add as many as you desire and use as many of the question type options as you like.
6. When creating questions you will need to indicate which is the correct answer by selecting the correct answer in the corresponding circular radio button. There are also numerous options you can choose as to how questions and poll results are displayed. There is the option to set a timer to give participants a set amount of time to answer. You can also configure how many possible answers there are for participants to choose from. We recommend you experiment with these options and use the “preview” option in the top right of the poll deck screen to see how the questions will appear to your participants.
Note 1: Your poll decks are saved automatically every time you make a change.
Note 2: The summary slide for assignment section below the poll deck is not required in this example and is for a separate EchoPoll function.
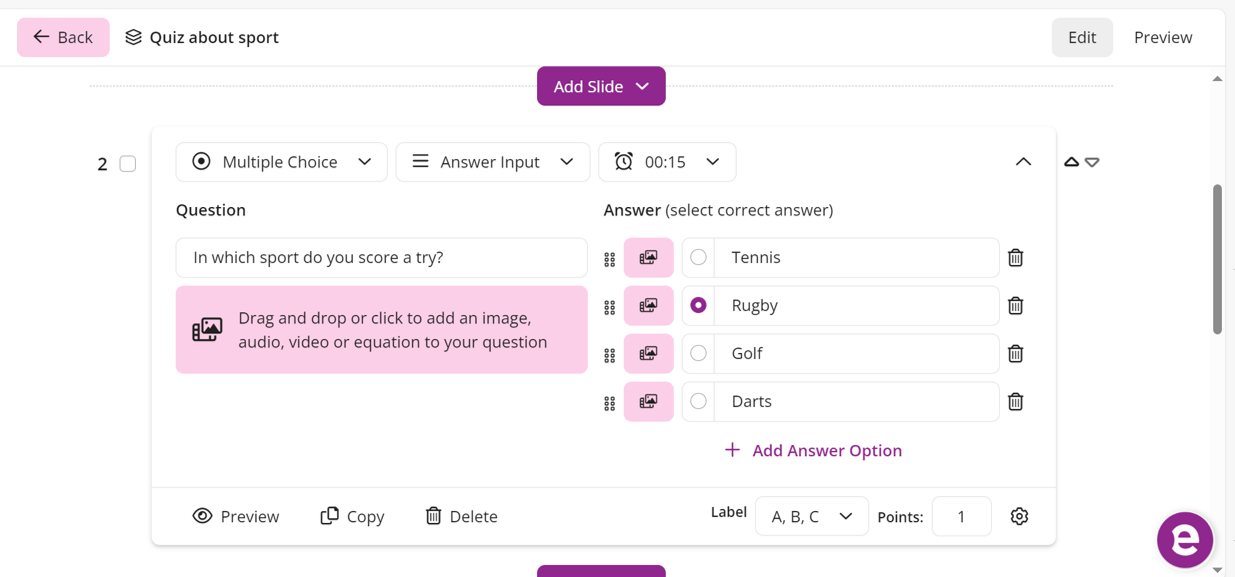
7. Once you have completed creating your deck of presentation slides and questions and you are ready to launch the poll, select the back option in the top left of your EchoPoll screen.
8. You will then land on your EchoPoll library where you will see your newly created Poll Deck. Select the “start” option next to the poll deck you wish to launch to begin setting up your polling session.
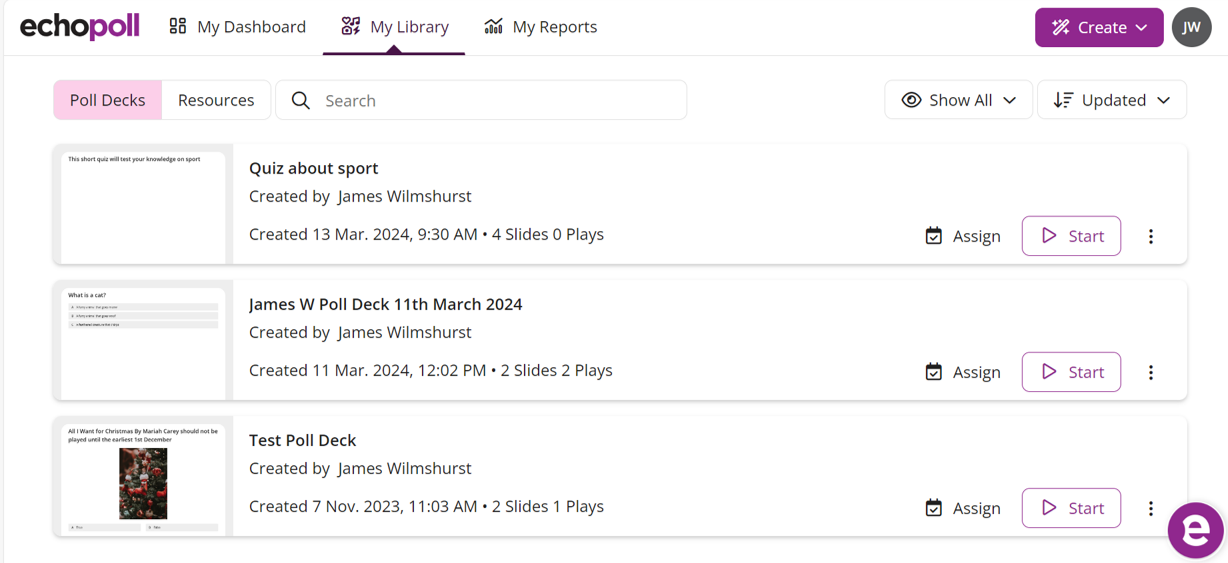
9. When you launch the poll deck this will begin to create a new “session”. A session on EchoPoll is a one time activity. So each time you launch a poll deck it will create a new session. The first thing you will be asked to do is to name this session. If you are planning on delivering this live polling session to multiple groups on different occasions then you may choose to name the session to reflect that e.g Quiz about Sport – Group 1. Or alternatively you could add the date of the session.

10. After naming your session you will need to select the “show settings” option. This is where you will be able to set the participation settings so that your participants can join and take part in the polling session on their own devices without having to sign in to an account. To do this you will need to select the “guests (public)” option.
Note: In this example please ignore and leave blank the course record option, this is for a separate EchoPoll function.
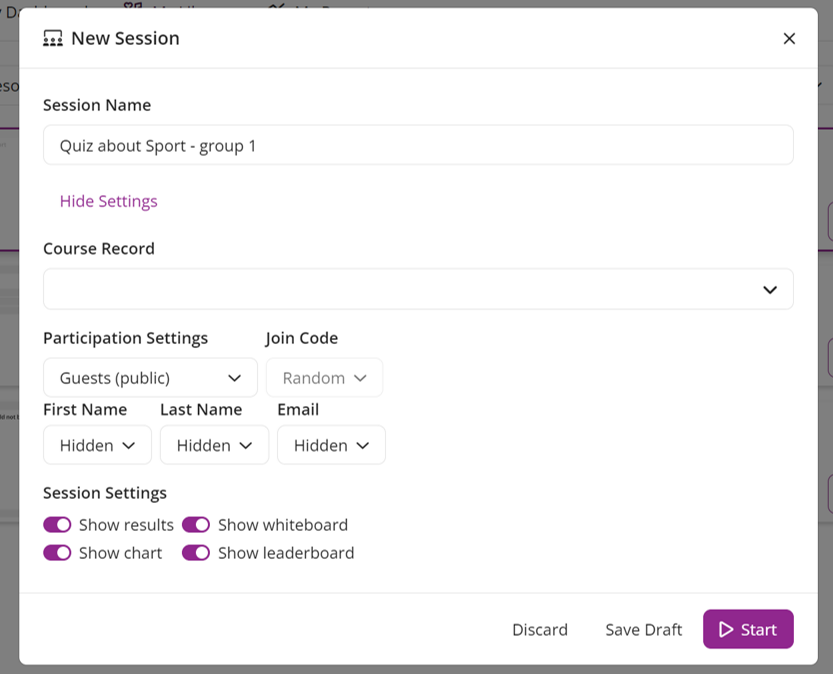
11. You will see on this screen there are also other options you can configure depending on your own preferences, such as if participants full names and emails are displayed on screen. There are also options for how results are displayed and an option for a whiteboard to be available for participants to engage with. You may wish to experiment with these to decide which settings you prefer to use.
12. Once you are happy with your settings select the start button.
13. Your session will then start and the joining slide will appear on screen. In the top right corner of this screen will be the EchoPoll web address echo360poll.eu and a joining code for participants to use to access your live poll.
Note: Participants will only be able to access the live poll when you as the instructor are actively running the session. This polling tool is for live polling and surveys and not for anytime polling. To create quizzes and polls that are not being delivered live we recommend using something such as Google Forms or Microsoft Forms.
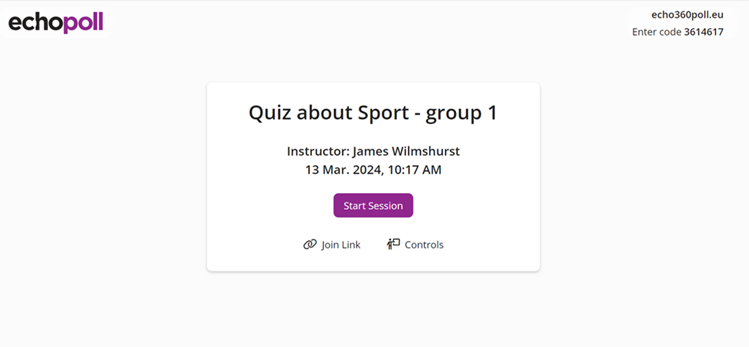
14. When you have given your participants time to join the session you can then select the start session button and deliver your session with the poll deck you have just created and launched. Participants will see the slides and questions on their own devices and be able to answer the questions and you can move through your session at your chosen pace and with your configured settings.
Note: If you end a session and want to relaunch it to the same participants it will create a new session and a new joining code.
Get Support:
The Digital Education and Service Development Team can support you with using digital tools for teaching, learning, assessment and student support.